How to Convert Video to Image Sequence with Adobe Media Encoder?

Adobe Media Encoder (AME) is a powerful tool that integrates seamlessly with other Adobe Creative Cloud applications, providing robust encoding capabilities for video and audio projects. One of its versatile features is the ability to convert video files into image sequences. In this article, we’ll guide you through the steps to convert a video to an image sequence using Adobe Media Encoder.
1. What is Adobe Media Encoder?
Adobe Media Encoder (AME) is a comprehensive media processing application that allows users to encode, transcode, ingest, create proxies, and output virtually any format you can imagine. As part of the Adobe Creative Cloud suite, AME seamlessly integrates with other Adobe applications like Premiere Pro, After Effects, and Audition, making it an essential tool for video professionals. It offers a variety of features that streamline the video production workflow, including batch processing, extensive format support, and custom preset creation.
2. How to Convert Video to Image Sequence with Adobe Media Encoder?
Converting a video to an image sequence is a valuable technique for animators, visual effects artists, and content creators who need individual frames for further manipulation. Here’s a step-by-step guide to converting a video to an image sequence using Adobe Media Encoder.
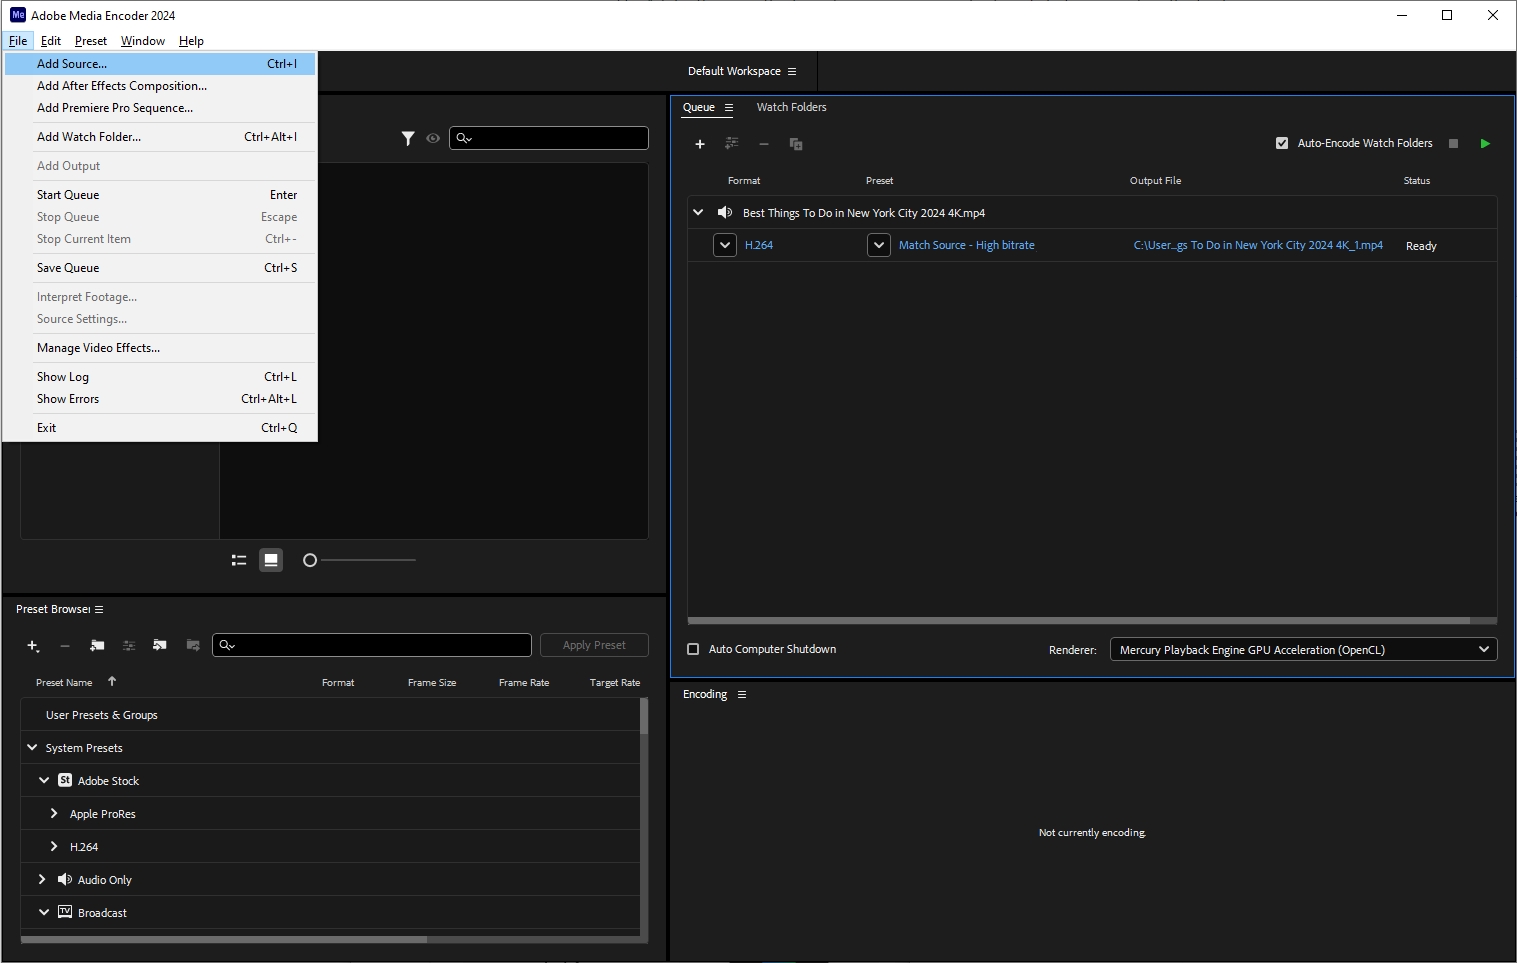
Step 1: Launch Adobe Media Encoder, drag and drop your video file into the queue panel, or use the “Add Source” button to browse and select your file.
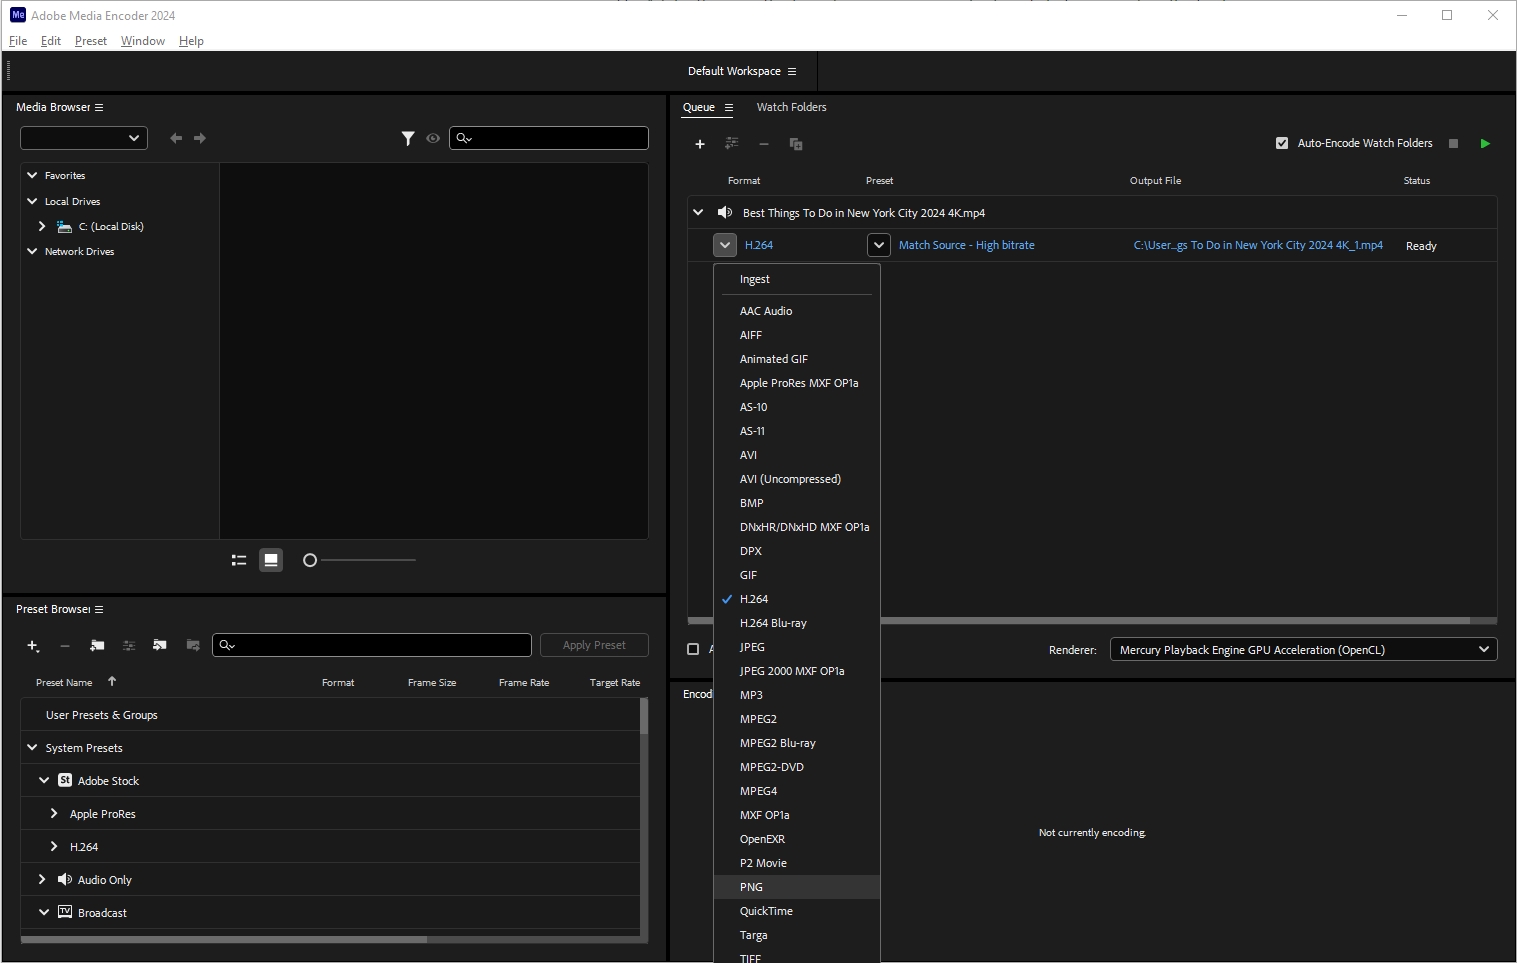
Step 2: In the queue panel, locate your video file and click on the format link next to it (usually set to a default format like H.264). From the format drop-down menu, select an image sequence format such as JPEG, PNG, TIFF, Targa, or BMP.
Step 3: Click on the preset link (e.g., “Match Source – High Bitrate”) to open the “Export Settings” dialog. In the “Video” tab, ensure the frame size and frame rate match your source video. Set the field order to “Progressive” and aspect to “Square Pixels”. Configure format-specific settings such as JPEG quality or PNG compression.

Step 4: Click “OK” to close the “Export Settings” dialog, then return to the main AME interface, click the green “Start Queue” button to begin the conversion process.
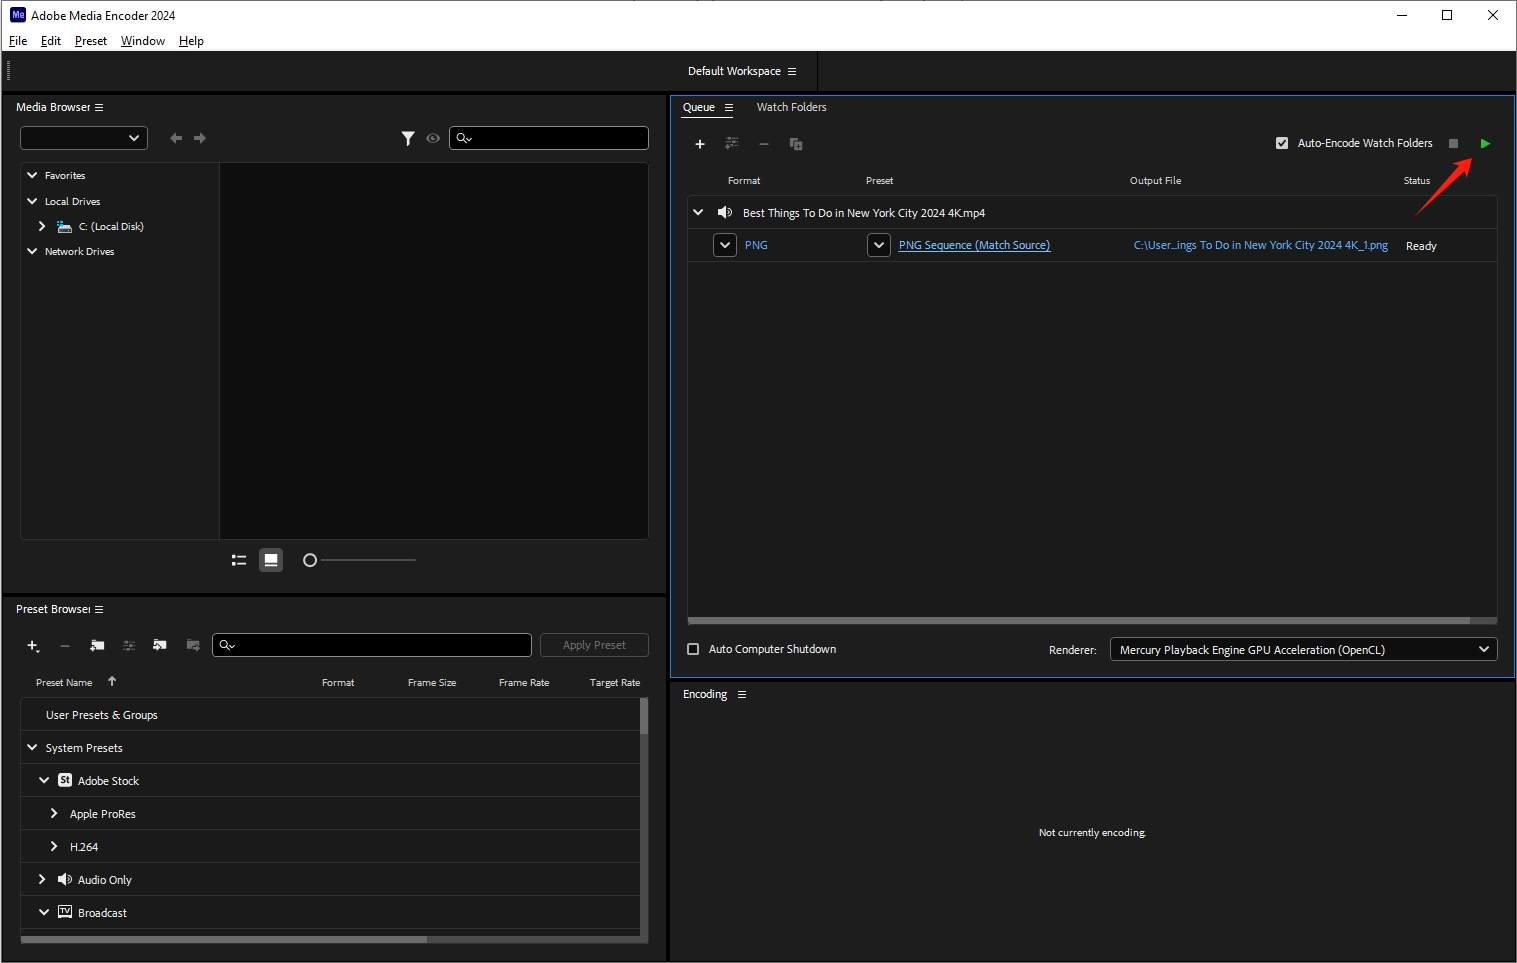
Step 5: Monitor the conversion process within the AME interface. Once encoding is complete, verify that your image sequence has been created in the specified output folder.

3. Pros and Cons of Using Adobe Media Encoder for Video-to-Image Conversion
Pros:
- High-Quality Output: AME ensures high-quality image sequences, maintaining the integrity of the original video.
- Integration with Adobe Suite: Seamless integration with other Adobe applications enhances workflow efficiency.
- Customizability: Extensive settings and preset options allow for tailored output that meets specific project needs.
Cons:
- Resource Intensive: Converting high-resolution or long-duration videos can be resource-intensive, requiring robust hardware.
- Learning Curve: New users might find the extensive settings and options overwhelming.
- Cost: Adobe Media Encoder is part of the Adobe Creative Cloud subscription, which can be expensive for some users.
- Limited to Adobe Ecosystem: Best utilized within the Adobe ecosystem, which may not be ideal for users of other software.
While Adobe Media Encoder is a robust and versatile tool, some users may seek an alternative with more advanced features for video-to-image conversion, making Sparkit a standout choice.
4. Recommended: Converting Video to Sequence of Images with Sparkit
Sparkit offers advanced features for video-to-image sequence conversion, it supports creating subtitles online, extract still images from the video and combine captured images into one in your preferred style. Sparkit provides a simpler interface and offers greater control over the conversion process, making it easier for beginners.
Here are the steps to convert cideo to tmage sequence with Sparkit:
Step 1: Download the Sparkit installer and install it on your computer by following the on-screen directions.
Step 2: Open Sparkit, then import a video from your PC and generate or upload a subtitle for it.
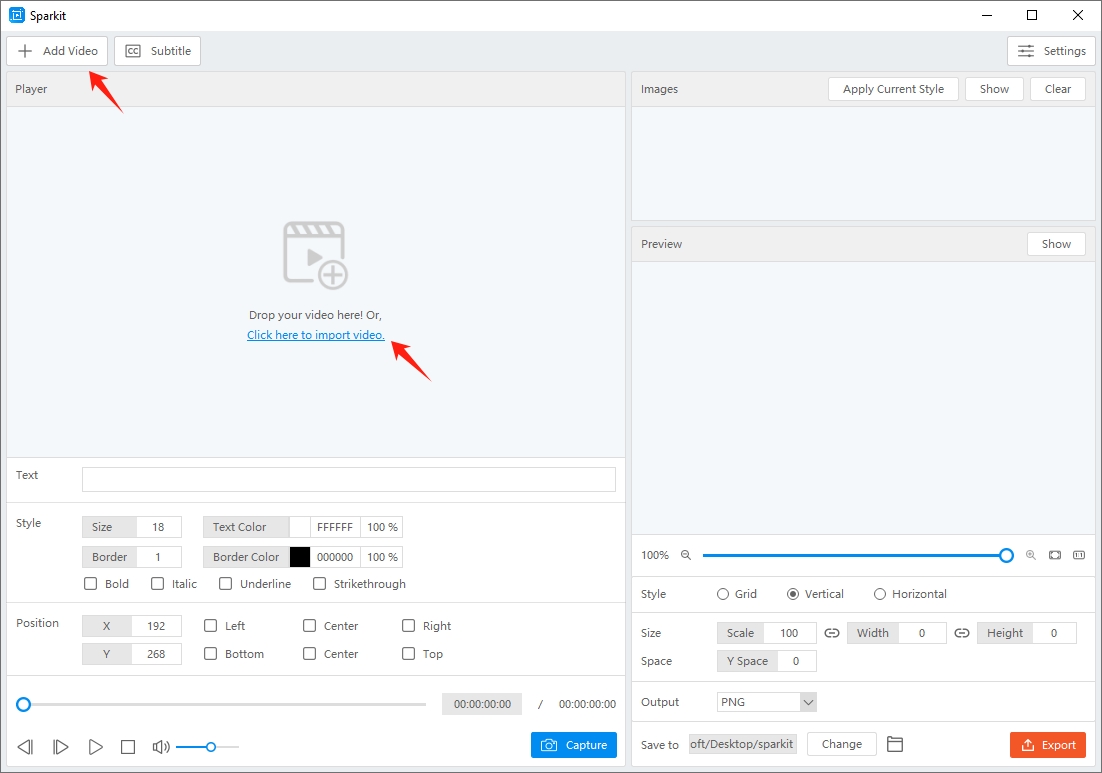
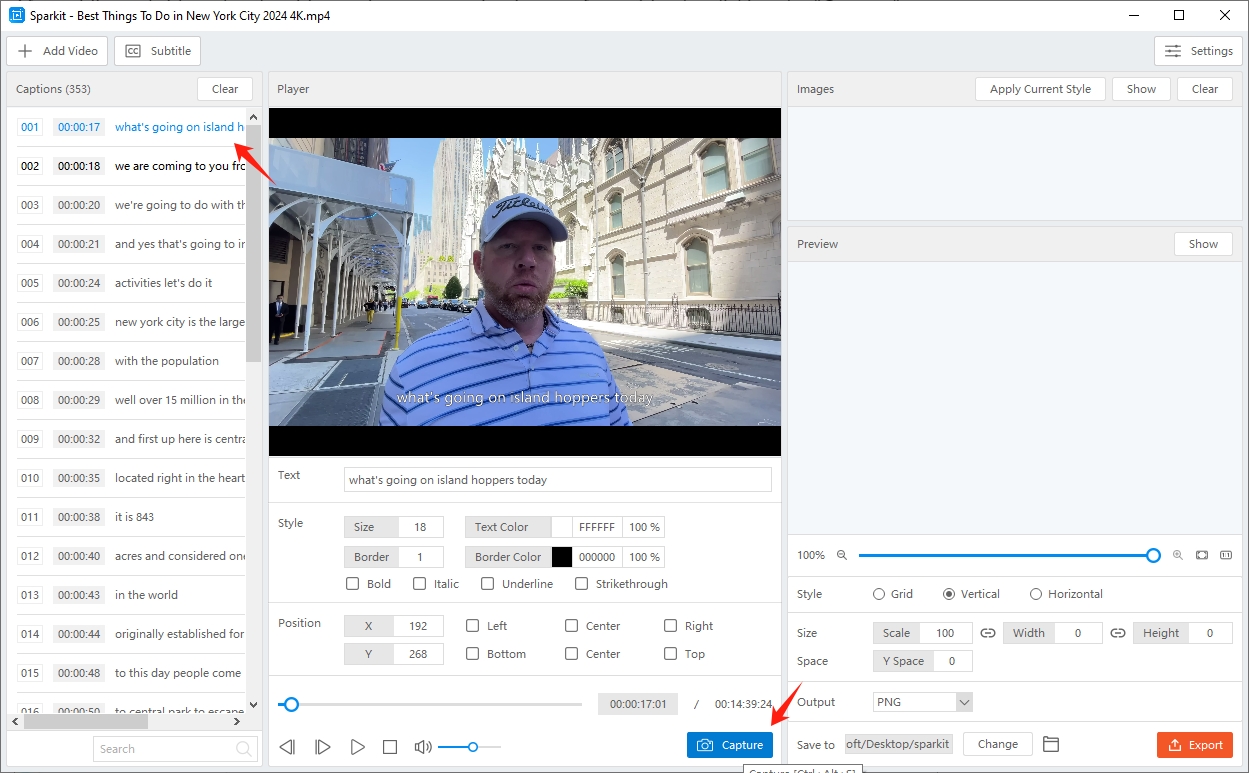
Step 3: Sparkit will extract and display all video frames depending on their subtitles. You can find a frame, click the “Capture” button, then change the subtitle style as desired.
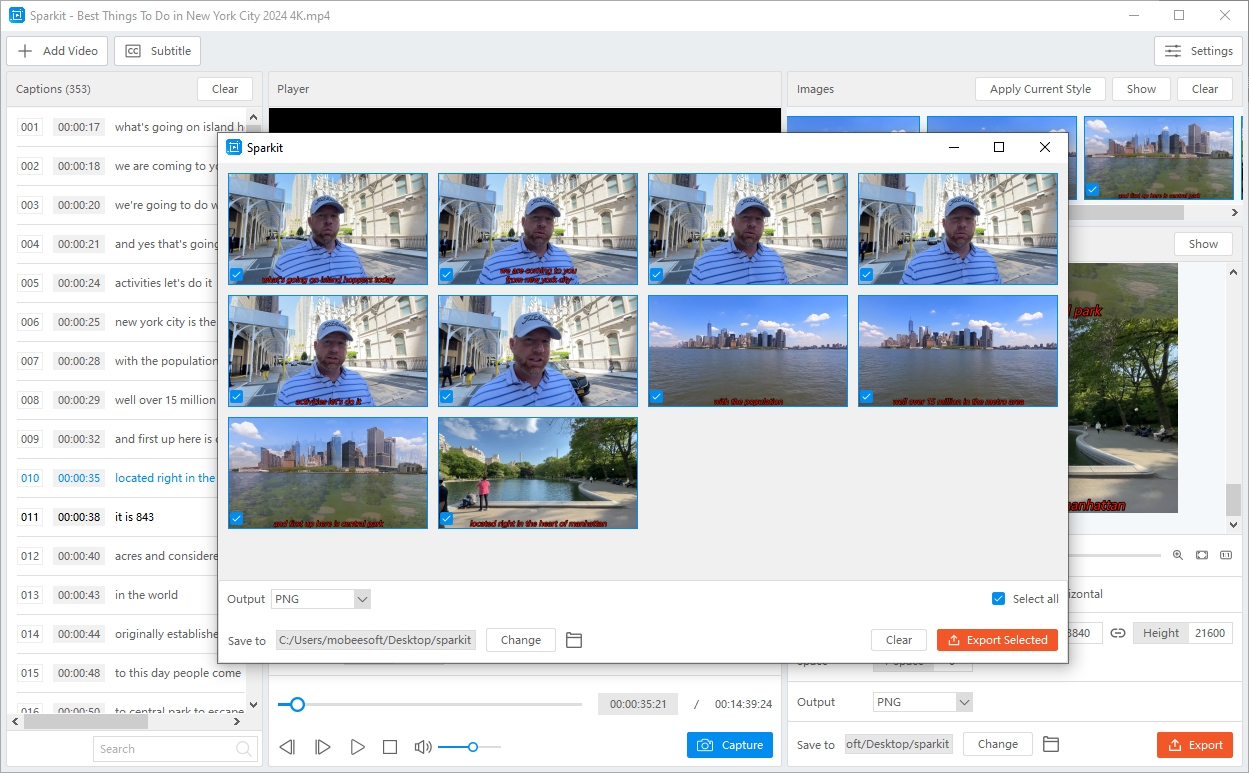
Step 4: In the “Images” section, you may access and evaluate taken snapshots, select images, and export them all with a single click.
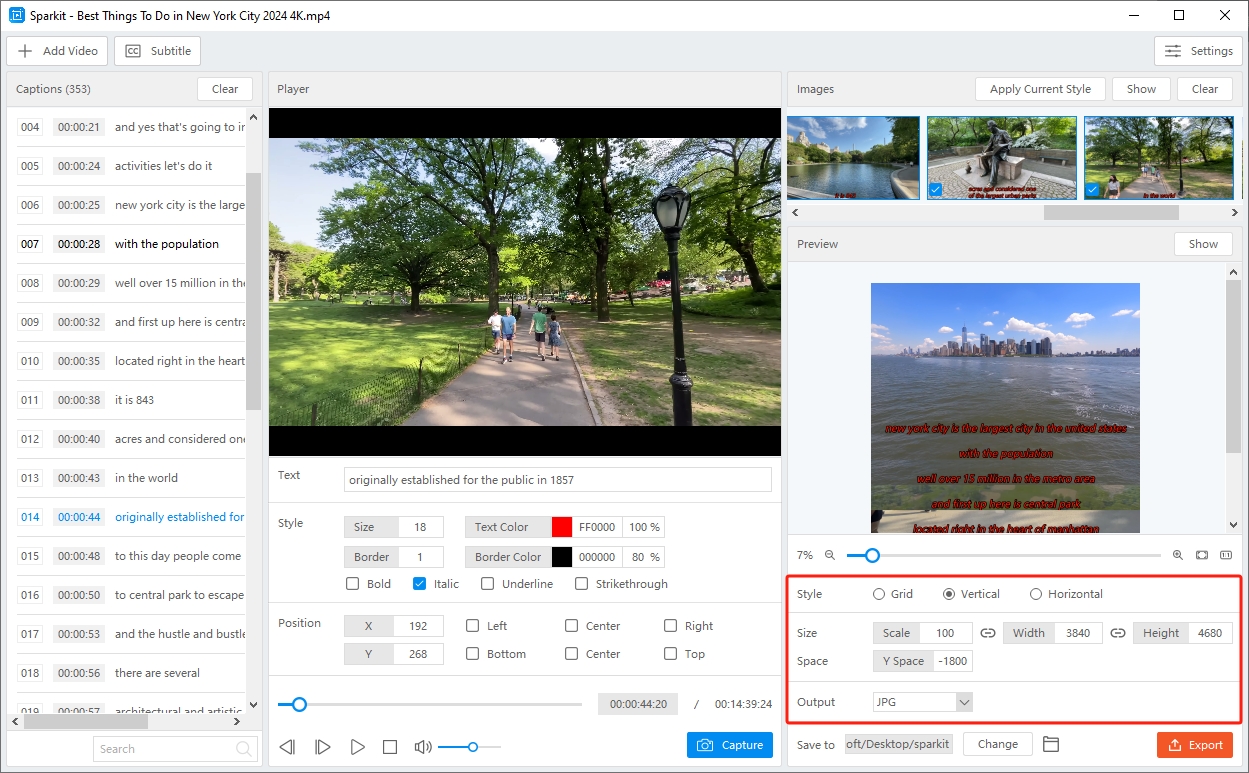
Step 5: If you want to combine selected captured images into a new image, go to the “Preview” area, change the output image style, and click the “Export” button.
5. Conclusion
Adobe Media Encoder is an excellent tool for converting videos to image sequences, offering a balance of ease of use, quality, and integration with the Adobe Creative Cloud ecosystem. However, Sparkit provides a more user-friendly interface that simplifies the conversion process and offers advanced features. If you need greater control, higher image quality, and advanced scripting capabilities, Sparkit is a highly recommended alternative. Consider downloading Sparkit and giving it a try to see how it can enhance your video-to-image sequence conversion workflow.