How to Rename Files with PowerShell and yt-dlp?

In the digital age, managing downloaded files efficiently is essential, especially for those who deal with a large volume of media content. Tools like yt-dlp have made downloading videos from various platforms easier than ever. However, the challenge often lies in organizing and renaming these files to fit your naming conventions or project requirements. PowerShell, a powerful scripting language available on Windows, offers a robust solution for renaming files. This article explores how to use PowerShell in conjunction with yt-dlp for renaming files, as well as discusses the pros and cons of this approach.
1. How to Rename Files with PowerShell and yt-dlp
Follow these steps to rename files with PowerShell and yt-dlp on your Windows computer:
Step 1: Installing yt-dlp
Before diving into the renaming process, you need to ensure that yt-dlp is installed on your system. The yt-dlp tool is a command-line application that gives you the ability to download videos from a variety of websites.
You can use pip, a Python package manager, to set up yt-dlp:
pip install yt-dlp
Alternatively, you can download the binary directly from the yt-dlp GitHub repository and place it in a directory included in your system’s PATH.
Step 2: Downloading Videos with Custom Filenames
One of the features of yt-dlp is the ability to customize the filenames of downloaded videos. This can be done using the -o (output template) option. The command below will download and save a video with the title as the filename:

This command will name the downloaded file after the video’s title, followed by the appropriate file extension.
Step 3: Renaming Files with PowerShell
After downloading videos, you might want to rename them to adhere to specific naming conventions or to organize them better. PowerShell provides a straightforward method to rename files using the Rename-Item cmdlet.
Renaming a Single File
You are able to use the following command in order to rename a single file with PoerShell:

This command will rename the video file located at C:\path\to\file.mp4 to new-filename.mp4.
Renaming Multiple Files
If you have multiple files to rename, PowerShell can handle this through a loop. The following script adds a prefix to all .mp4 files in a specified directory:
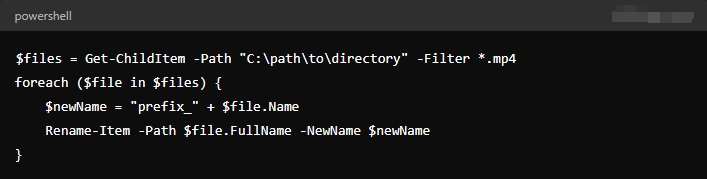
This script loops through all .mp4 files in the directory and renames them by adding “prefix_” at the beginning of each filename.
Renaming Based on Metadata
To rename files based on metadata such as the uploader’s name or video title, you can use yt-dlp’s output template in combination with PowerShell:

This command saves the video with a filename in the format: UploaderName – VideoTitle.mp4.
2. Pros and Cons of Using PowerShell and yt-dlp for Renaming Files
Pros
- Customization: PowerShell and
yt-dlptogether offer a high degree of customization. You can tailor the filenames to include specific metadata or follow any naming convention you prefer. - Automation: PowerShell scripts can be automated to handle large batches of files, making it a powerful tool for repetitive tasks.
- Flexibility: PowerShell is versatile and can be used to rename files based on various conditions, such as date, file type, or size.
- Free and Accessible: Both PowerShell and
yt-dlpare free and readily available tools, making them accessible to anyone with a Windows system.
Cons
- Complexity: While powerful, PowerShell scripting can be complex and intimidating for beginners. Mistakes in scripts can lead to undesired results, such as incorrect file renaming.
- Limited GUI: PowerShell is a command-line tool, which may not be user-friendly for those who prefer graphical interfaces.
- Error-Prone: Without proper testing, PowerShell scripts can be error-prone, especially when dealing with a large number of files.
3. Best Tool for Multiple File Renaming: RenameKit
While PowerShell and yt-dlp offer powerful options for renaming files, they may not be the best choice for everyone, especially when dealing with large batches of files. This is where RenameKit – a bulk renaming tool shines. RenameKit provides an intuitive graphical interface and offers a wide range of renaming options, including adding prefixes, suffixes, numbering, changing file extensions, and more. It also supports renaming based on file metadata, such as date modified, size, or file attributes.
Let’s dive into how to rename all files using RenameKit:
Step 1: Download RenameKit by tapping the button below and follow the installation instructions.
Step 2: Open RenameKit and add all files that you want to rename into the software interface.
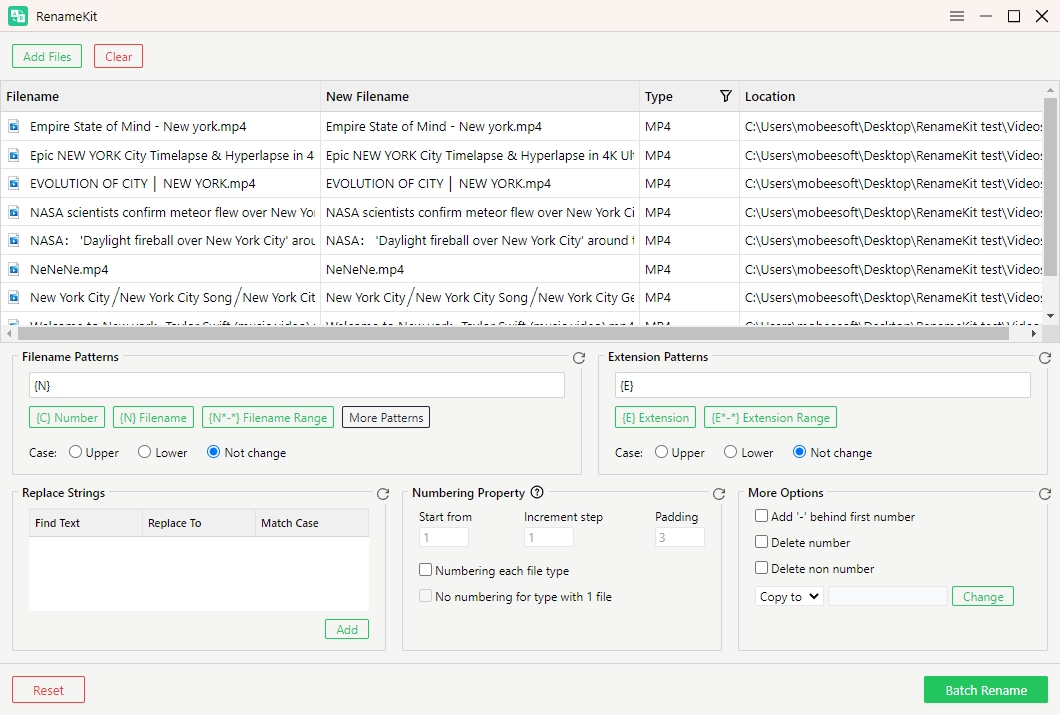
Step 3: Choose the renaming rules that fit your needs. You can combine multiple rules to create a complex renaming scheme.
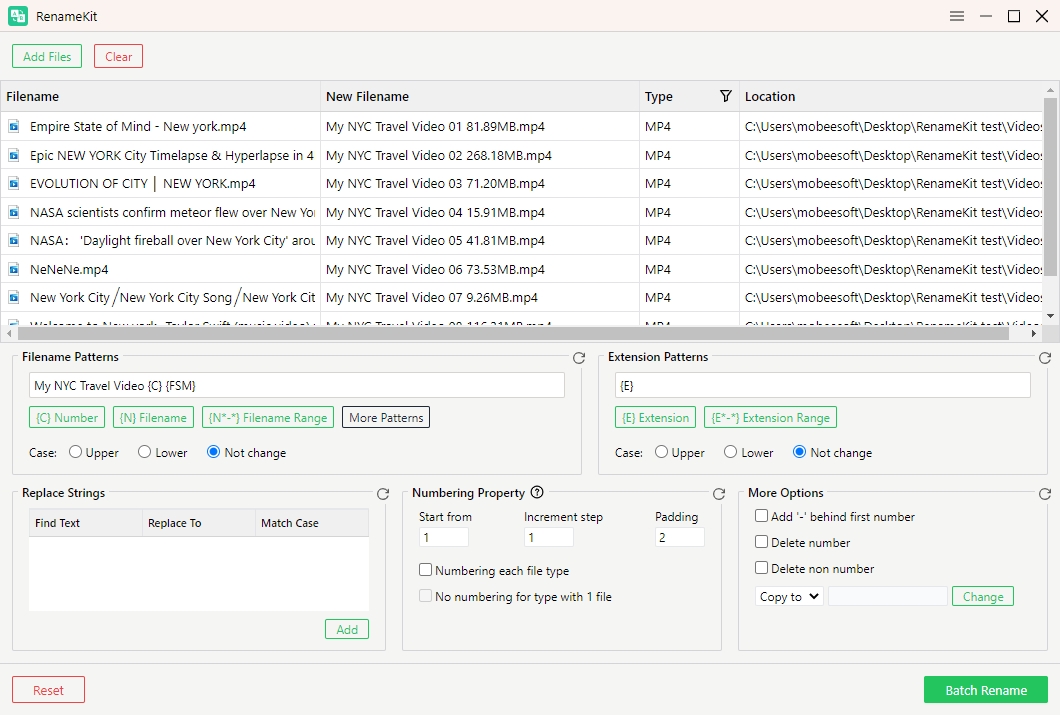
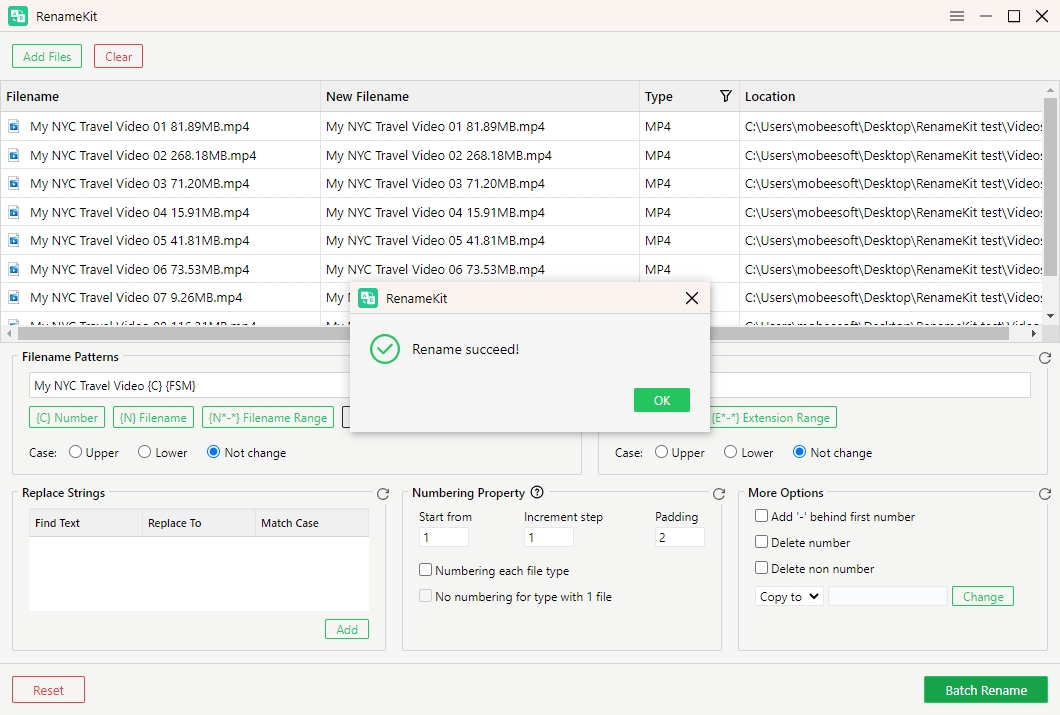
Step 4: Review the preview carefully to avoid any mistakes, then click “Batch Rename” to apply the rules to all the selected files.
Conclusion
While PowerShell and yt-dlp provide powerful methods for renaming files, they require a certain level of technical expertise and can be error-prone if not used carefully. For those who manage large volumes of files or prefer a graphical interface, RenameKit is the superior choice. It combines ease of use with powerful features, making it ideal for both beginners and advanced users. With its robust set of tools and preview functionality, RenameKit ensures that your files are renamed accurately and efficiently, making it the recommended solution for multiple file renaming tasks.